Escalate an Approval Task with Delay
In this exercise you will learn how you can schedule (‘delay’) the execution of an automation rule in the future.
In the previous exercise, we already explained that for each site a backup parking administrator is defined with UI extension id backup_parking_admin. When the parking administrator does not approve or reject the parking reservation within 24 hours, the approval task should be escalated to the backup parking administrator.
For this exercise you need to introduce delayed automation rules: you want the automation rule not to be executed immediately, but in 24 hours. You need 2 automation rules, a first automation rule with the delayed action (in this case the escalation), and a second one with the delay definition.
You need to start with the delayed action. Create a new Task Template Automation Rule on the ‘Reserve a Parking Space – Approval’ task, with the name ‘Escalate an Approval Task with Delay’.
Make sure you are setting up your Automation Rules on the correct task!
As a trigger, select After delay:
| Trigger | After delay |
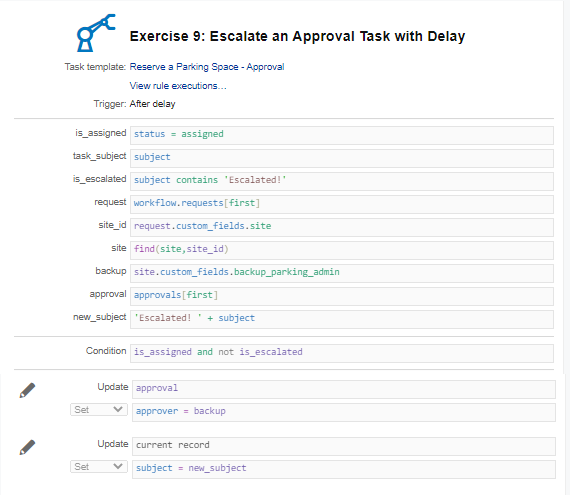
This automation rule needs 2 conditions: the status of the task must still be ‘Assigned’ and the task must not have already been escalated. For the latter, you will check the subject, since when a task is escalated, we prefix the subject of the task with the phrase ‘Escalated!’, so the backup knows that this might be urgent. In our automation rule you will check if the subject contains this phrase, and, if it does, you know the task was already escalated, and you will not perform an extra escalation.
This is the code you will add for the condition:
is_assigned |
status = assigned |
task_subject |
subject |
is_escalated |
task_subject contains ‘Escalated!’ |
| Condition | is_assigned and not is_escalated |
Next, you will need to retrieve the backup parking administrator from the selected site, get the person record of the backup parking administrator and retrieve the first approval record (you know how to do that).
Then, you need to create a new subject. Adding 2 strings is easy: you can use the ‘+’ sign as the operator (‘concatenation’). This becomes:
new_subject |
‘Escalated! ‘ + subject’ |
Finally, you add the 2 actions: you set the new approver and the new subject:
| Update | approval |
| Set | approver = backup |
| Update | Current record |
| Set | subject = new_subject |
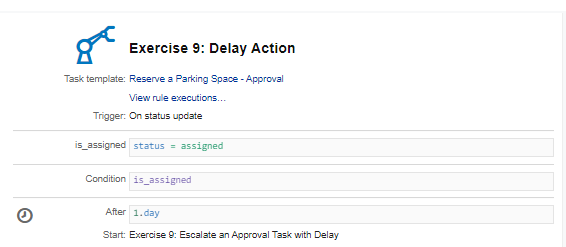
Now you need to define the delay action. This is another automation rule: create a new Task Template Automation Rule on ‘Reserve a Parking Space – Approval’ task, with the name ‘Delay Action’. As a trigger, select ‘On Status update’ and the condition for execution is when the status of the task gets ‘Assigned’ (you know how to do that).
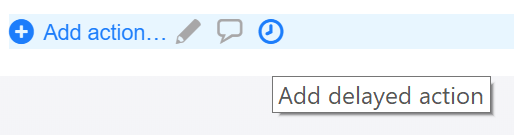
Next you can define your action. Because you defined an automation rule with the trigger ‘After Delay’, a new action type is available, the ‘Add delayed action’ (icon is a clock).
Select the ‘Add delayed action’. You will need to add the delay (24.hours or 1.day) and specify the Automation Rule that you want to start (you can select an Automation Rule from the list).
| After | 24.hours |
| Start | Escalate the approval task with delay |
That’s all! To test this automation rule, you probably want to set the delay on 1 or 2 minutes.